AI Material Scanner Guide
Save hours of manual data entry with intelligent screenshot analysis
What is the AI Material Scanner?
The AI Material Scanner is a revolutionary feature that automatically extracts material usage data from screenshots of your 3D printing software. Instead of manually typing in filament weights, wastage amounts, and print times, simply upload or paste a screenshot and let AI do the work for you.
What It Extracts
- ✓ Material Usage: Filament/resin used per color (in grams)
- ✓ Wastage: Support, Tower, Purge, and Flushed material (automatically summed)
- ✓ Time Estimates: Prepare time, model printing time, and total time
How to Use
Step 1: Prepare Your Screenshot
In your 3D printing slicer (PrusaSlicer, Cura, Bambu Studio, etc.), navigate to the material usage summary or statistics page. Take a screenshot that clearly shows the material table with filament numbers, usage amounts, and wastage columns.
Step 2: Open the Scanner
In StockCraft, navigate to your product edit page and click the "Smart Import Materials" button in the Direct Materials section.
Step 3: Upload the Screenshot
You have three options:
- Paste: Press Ctrl+V (Windows) or Cmd+V (Mac) to paste from clipboard
- Drag & Drop: Drag the screenshot file onto the upload area
- Browse: Click to browse and select the file from your computer
Step 4: Scan the Image
Click the "Scan Materials" button. The AI will analyze your screenshot and extract all material data within seconds.
Step 5: Map Materials
Review the scanned data and map each detected filament to your existing materials in StockCraft. Use the dropdown menus to select the corresponding material for each filament number.
Step 6: Confirm and Save
Click "Confirm & Save" to add the scanned materials to your product. The material usage and wastage will be automatically calculated and added to your product's cost.
See It In Action
Here's what the AI Material Scanner looks like in action, from upload to final cost summary:
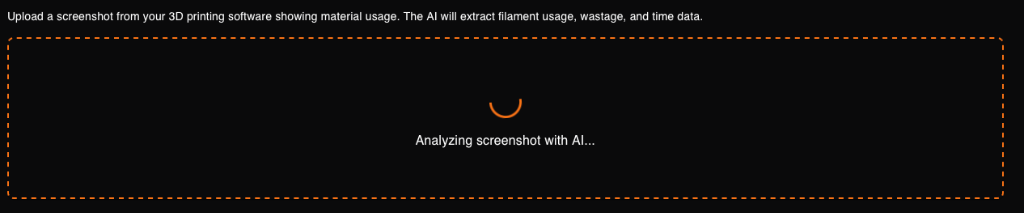
Step 1: AI Analysis
Upload your screenshot and the AI immediately begins analyzing the material data:
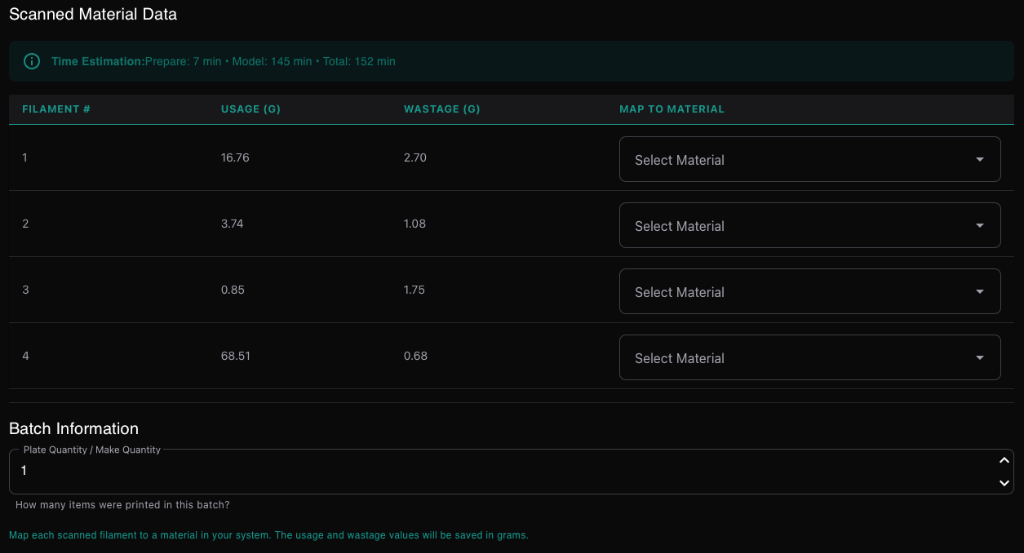
Step 2: Review & Map Materials
The AI extracts all material data including usage, wastage, and time estimates. Map each filament to your existing materials:
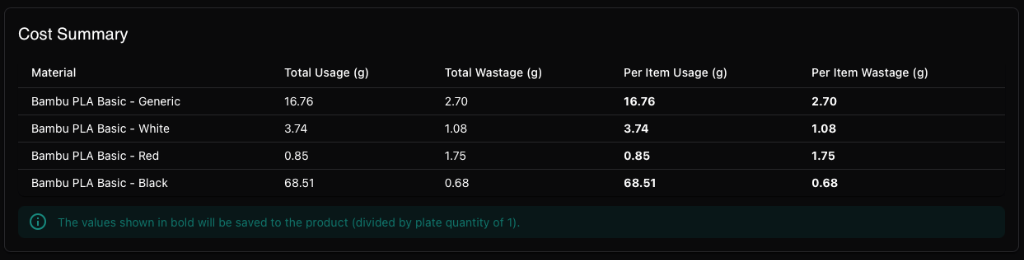
Step 3: Cost Summary
Once mapped, see a complete cost breakdown with per-item calculations automatically generated:
Supported Software
The AI Material Scanner works with screenshots from any 3D printing slicer software, including:
Tips for Best Results
- Capture the entire table: Make sure all columns (Filament, Model, Support, Tower, etc.) are visible
- Use good contrast: Light mode screenshots generally work better than dark mode
- Include headers: Column headers help the AI understand the data structure
- Avoid cropping too tightly: Include some context around the table
- Supported formats: PNG, JPEG, and WebP images all work great
Usage Limits
Free Plan
scans per month
Counter resets on the 1st of each month
Plus Plan
scans per month
Just $5/month for unlimited scanning
Troubleshooting
AI couldn't extract data
Ensure the screenshot clearly shows a table with material data. Try retaking the screenshot with better lighting/contrast, or manually crop to focus on just the material usage table.
Incorrect values detected
You can manually adjust any scanned values before saving. The AI is very accurate but you always have final control over the data.
Reached monthly limit
Free plan users get 10 scans per month. Upgrade to Plus for unlimited scans, or wait until the 1st of next month when your counter resets.
Image upload failed
Check your internet connection and ensure the image file is under 10MB. Supported formats are PNG, JPEG, and WebP.
Ready to Save Hours of Data Entry?
Start using the AI Material Scanner today and never manually type material data again.
Get Started Free